Hi! Remember me??? Yeah, I'm still around... Mostly hanging out on Facebook and Pinterest. I had a friend come into town a couple weekends ago to go to the Mid-Atlanic Quilt Festival, and boy did we have some fun!
After she left, I found my way back up to my craft room, and made something that I desperately needed for the show. A cinch sack backpack. They are so easy, and I texted her a picture, and she said she needed to learn how to make them. Since it was so easy, I thought I'd make another one and take pictures along the way to make a tutorial.
Nothing like jumping back into the blog-o-sphere with a first time tutorial, right? I'm sure there are other ways to make these, but this is how I made mine. Well, the second one. :)

I cut a piece of fabric to 18x 32 and squared up all the edges.
I turned each raw edge under between 1/8 and 1/4 inch and sewed it down. Not a necessary step, but later on, it makes for a much more finished look.
I did all four sides.
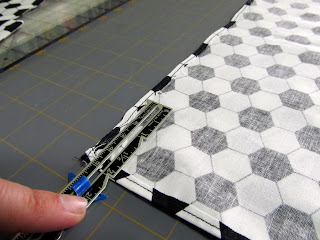
Then I measured 2 inches from the short edges...
marked both ends....
...folded it over....
...and pressed it down.
Then I sewed it down over the existing seam.
Temporarily set aside your main piece, and cut another piece 2.5x6. (Yes, mine is 10" in the picture, but 6" is just fine.)
Fold in half lengthwise.
Sew a scant 1/4 inch to create a tube.
Turn the tube right side out however is easiest for you...
...and press.
Cut the tube into two 3inch long strips. Fold in half raw edges together and press. I'll refer to these as "tabs".
Here's where it's difficult for me to describe. Fold your main piece of fabric, right sides together, short ends meeting. At the fold at the bottom, tuck in your "tabs"so the raw edges are between your layers, and facing the outside edge.
Pin your "tabs" in place.
Starting just below your folded over edge at the top your cinch sacks, sew down the length of each side...
...re-inforcing your stitches over your "tabs".
Notice that the top is open at both ends at the top where it was folded over and stitched. This is good.
Turn right side out and press. Notice the tabs a the bottom?
Cut two pieces of cording 72 inches long each.
Attach a safety pin to one end of a piece...
...and feed all the way around in the top where your openings are to where you started.
Take the second piece, and start at the opposite side, and feed all the way around again to the that starting point. You should now have two raw ends coming out each side that are each part of the same piece of cord. When pulled they should "cinch" the top.
On each end, feed the cording down to the tab...
...and tie in a knot.
And you're done!
The first one took me about 40 minutes. The second took about 30 minutes, but that was with stopping to take pictures. These are quick and easy, and make cute gifts, or just a useful bag to throw a few things in and take off. They are lightweight, and if they get dirty? Just take the cording out, and throw it in the wash.
Please leave a comment if you make one of these. Or if you have questions about something I posted here.
AMW


